GCPを使ってサーバレスでSlackの統計データを取れるようにした話
この記事はSlack Advent Calendar 2018の7日目の記事です。
(8日目を書いた後に7日目が空いていたので書くことにしたため日付を前後して書いております)
TL;DR
- SlackのEvent APIとGoogle Cloud Platformを利用するとサーバレスかつ簡単にSlackのPublicなPostデータが管理できる
- 溜まったデータもサーバレスかつ簡単に統計データを得ることができる
- 個人でやるにはちょっとお高めかも
背景
800人近い人がワイワイしているSlackコミュニティに所属しているのだが、 昨年まで年間の発言数ランキングなどを作ってくれていた人がいなくなったこともあり、 今年の発言ランキングをどうしようかと考えていたが、 自分でつくろう、なんなら週間ランキングも出してしまおうと思い作ることにした。
ゴール
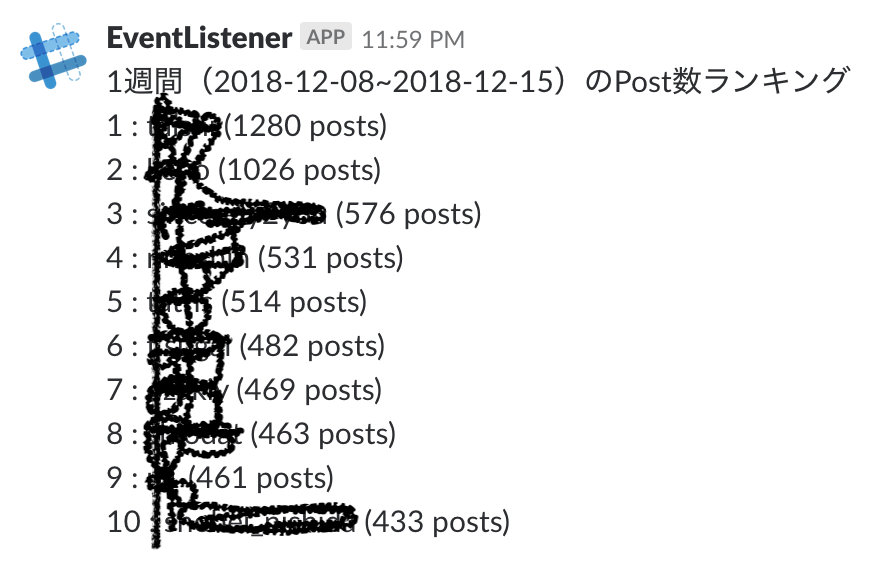
まずは1週間の発言ランキングを毎週月曜日の9時に #general にBOTがPostすること。
全体像


BigQueryにデータを投入する際にやったこと
1. Cloud Pub/Subの設定
Cloud FunctionsからBigQueryに転送するために利用するトピックを作成
2. Cloud Functionsの設定
SlackのEvent APIから送られてくるデータをCloud Pub/Subに送るためのFunctionを作成。
今回はPythonを選択。
- main.py
from flask import make_response
from google.cloud import pubsub_v1
import os
import json


def _event_handler(data, event_type, subtype=None):
    if event_type == 'message' and subtype == None:
        publisher = pubsub_v1.PublisherClient()
        topic_name = os.environ['TOPIC_NAME']
        payload = {
            'channel': data['channel'],
            'user': data['user'],
            'ts': data['ts'],
        }
        publisher.publish(topic_name, json.dumps(payload).encode('utf-8'))

    return make_response('OK', 200)

def get_slack_event(request):
    slack_event = request.get_json()

    if 'challenge' in slack_event:
        return slack_event.get("challenge")

    if "event" in slack_event:
        event = slack_event.get("event")
        event_type = event.get("type")
        subtype = event.get("subtype")
        return _event_handler(event, event_type, subtype)

    return make_response("[NO EVENT IN SLACK REQUEST] These are not the droids\
            you're looking for.", 404, {"X-Slack-No-Retry": 1})
- requirements.txt
flask
google-cloud-pubsub
- 環境変数 TOPIC_NAMEの設定(2で作成したCloud PubSubのTopic名)
3. SlackのEvent APIを設定
- SlackのIntegration枠を一つ使ってCreate New Appをする。
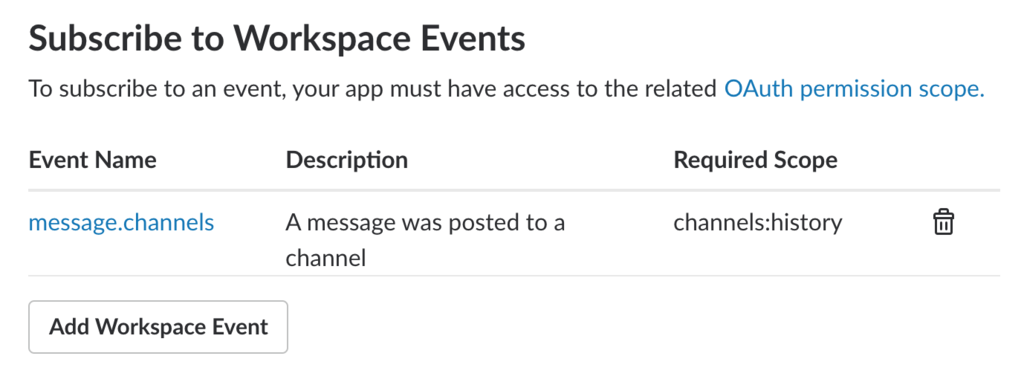
- 「Subscribe to Workspace Events」に「message.channels」を設定

Event SubscriptionsのRequest URL に対して3で作成したCloud Functionsのアクセス先を設定。
4. BigQueryの設定
今回はTimestamp, Channel ID, User IDを取得することにしているのでこの3つを設定。

5. GCSの設定
次に設定するDataflowで利用するためのディレクトリを作成
6. Dataflowの設定
- 「テンプレートからジョブを作成」を選択
- ジョブ名を設定
- 「Cloud Pub/Sub to BigQuery」を選択
- 「Cloud Pub/Sub input topic」1で作成したTopicを設定
- 「BigQuery output table」に4で設定したテーブル名を設定
- 「一時的なロケーション」に5で設定したGCSのパスを設定
7. 動作確認
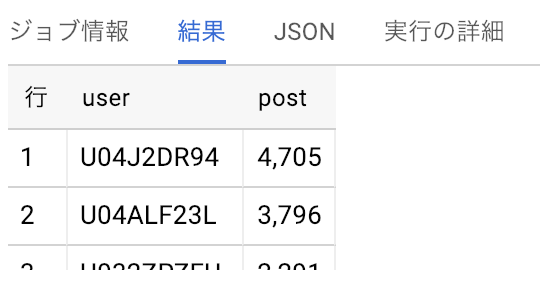
BigQueryでデータが取れることを確認。
Query
SELECT user, count(ts) as post FROM `table_name`
group by user
order by post desc
LIMIT 10

BigQueryから情報を出す際にやったこと
1. SlackのBOT用のトークンを取得
2. Cloud Functionsの設定
Cloud Schedulerから起動するCloud Functionsを設定
今回は user_weekly_post_count という名前で作成
BigQueryにはユーザIDしか入っていないのでこちらでusers.infoから名前を取得しています。
import json
import os

from datetime import date, timedelta
from flask import make_response
from google.cloud import bigquery
from slackclient import SlackClient

def create_query_string():
    query_string = """
        SELECT user, count(ts) as post
        FROM `cloudtu-dev-02962067.ogura_bigdata_counter.messages`
        where TIMESTAMP('{} 00:00:00') <= ts and ts < TIMESTAMP('{} 00:00:00')
        group by user
        order by post desc
        LIMIT 10"""

    today = date.today()
    start = (today - timedelta(days=8)).isoformat()
    end = (today - timedelta(days=1)).isoformat()
    return (start, end, query_string.format(table_name, start, end))

def query_user_weekly_post_count(request):
    request_json = request.get_json()
    if not (request_json and 'key' in request_json):
        return make_response("Authentication error", 403)

    client = bigquery.Client()
    start, end, query = create_query_string()
    query_job = client.query(query)

    results = query_job.result()  # Waits for job to complete.

    slack_token = os.environ["SLACK_API_TOKEN"]
    key = os.environ["KEY"]
    sc = SlackClient(slack_token)
    result = '1週間({}~{})のPost数ランキング\n'.format(start, end)
    rank = 0
    for row in results:
        user = sc.api_call(
            "users.info",
            user=row.user
        )
        user_name = user["user"]["name"]
        rank += 1
        result += '{} : {} ({} posts)\n'.format(rank, user_name, row.post)

    sc.api_call(
        "chat.postMessage",
        channel="general",
        text=result
    )
    return make_response(result, 200)
flask
google-cloud-bigquery
slackclient
3. Cloud Schedulerの設定
先月11月にCloud Schedulerというスケーラブルなcronのサービスが出ていたのでGAEなどを使わずCloud SchedulerからCloud Functionsが多々けるのではないかと思い試してみた。
なお、Cloud Schedulerはベータサービスということもあってか のWeb GUIではBodyの設定をしてもうまく反映されないことがわかったので、CLIから操作した。
コードは以下の通りで、URIとmessage-bodyは各自で設定が必要。
#!/bin/bash
gcloud beta scheduler jobs create http user_weekly_post_ranking    \
  --schedule="0 9 * * 1" \
  --uri="https://asia-northeast1-$PROJECT_ID.cloudfunctions.net/user_weekly_post_count" \
  --time-zone="Asia/Tokyo" \
  --headers="Content-Type=application/json" \
  --message-body="{\"key\":\"$KEY\"}"
4. 動作確認
Cloud Schedulerに「Run now」のボタンがあるので押して動作を確認。

まとめ
SlackのEvent APIとGCPのサービスを利用することで簡単にSlackデータを蓄積を実現し、また定期的にSlackに統計データを通知する事が可能になりました。
ただ、Dataflowは利用は無料枠がなく使い始めると即お金がかかるのでもう少し安くするためにはCloud FunctionsからストリームでBigQueryにデータを入れる or 一時的に何処かに蓄積したものをBigQueryに投入するなどの工夫が必要になってくると思います。なので、また何か改善した際はブログに書きたいと思います。